Appendix A. Installing GHC and Haskell libraries
Table of Contents
We are providing the instructions below based on our experience installing GHC and other software in late 2008. Installation instructions inevitably become dated quickly; please bear this in mind as you read.
Installing GHC
Because GHC runs on a large number of platforms, we focus on a handful of the most popular.
Windows
The prebuilt binary packages of GHC should work on Windows Vista and XP (even Windows 2000). We have installed GHC 6.8.3 under Windows XP Service Pack 2; here are the steps we followed.
![[Note]](/support/figs/note.png) | How much room does GHC need? |
|---|---|
On Windows, GHC requires about 400MB of disk space. The exact amount will vary from release to release. |
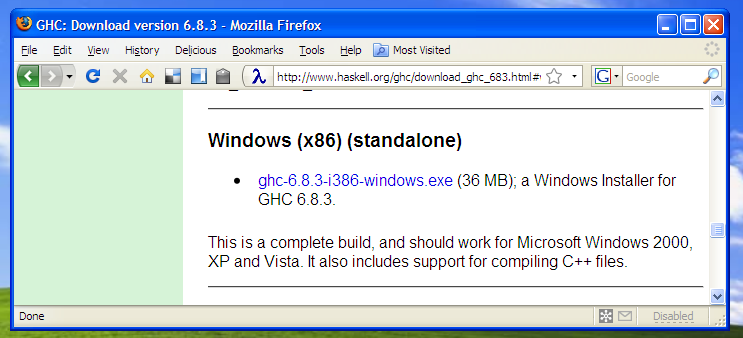
Our first step is to visit the GHC download
page, and follow the link to the current stable
release. Scroll down to the section entitled “Binary
packages”, and then again to the subsection for
Windows. Download the installer; in our case, it's named
ghc-6.8.3-i386-windows.exe.
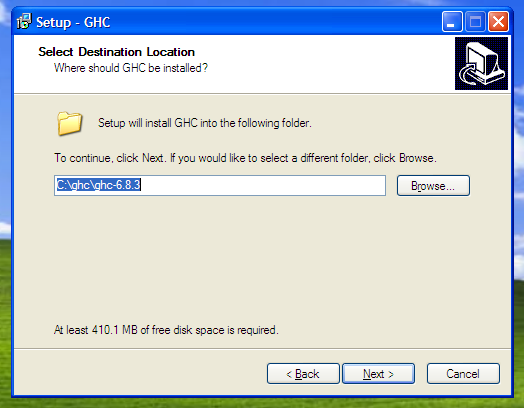
After the installer has downloaded, double-clicking on it starts the installation process. This involves stepping through a normal Windows installer wizard.
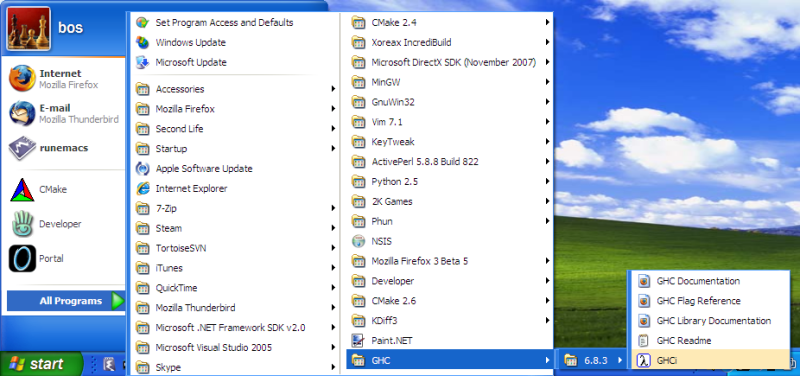
Once the installer has finished, the Start Menu's “All Programs” submenu should have a GHC folder, inside of which you'll find an icon that you can use to run ghci.
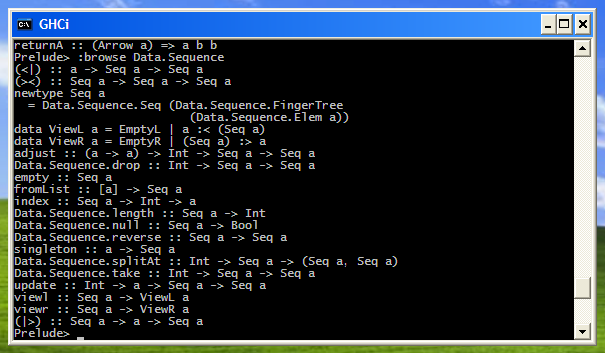
Clicking on the ghci icon brings up a normal Windows console window, running ghci.
Mac OS X
We have installed GHC 6.8.3 under Mac OS X 10.5 (Leopard), on an Intel-based MacBook. Before installing GHC, the Xcode development system must already be installed.
The Xcode software installer may have come bundled on a DVD with your Mac. If not (or you can't find it), you should be able to download it from Apple. Once you've finished installing Xcode, continue on to download GHC itself.
Visit the GHC download page, and follow the link to the current stable release. Scroll down to the section entitled “Binary packages”, and then again to the subsection for Mac OS X. There is a single installer package available. Download and run it.
![[Tip]](/support/figs/tip.png)
The installation process should take a minute or two. Finally, you should be able to successfully run the ghci command from your shell prompt.
Ubuntu and Debian Linux
Under both Ubuntu and Debian, you can install a minimal working version of GHC by running sudo aptitude install ghc6 from a shell prompt.
These distros maintain a small core GHC package, which
is insufficient for much practical development. However, they
make a number of additional prebuilt packages available. To
see a complete list of these prebuilt packages, run
apt-cache search libghc6. We recommend
that you install at least the mtl package, using
sudo aptitude install
libghc6-mtl-dev.
Since you will probably want to profile the performance of
your Haskell programs at some point, you should also install
the ghc6-prof package.
Fedora Linux
GHC is available as a standard Fedora binary package. From a shell, all you need to do is run the following command:
sudo yum -y install ghc ghc-doc ghc683-profThe base package, containing the ghc and ghci commands
and libraries, is ghc. The
ghc-doc package contains the GHC user
guide, and command and library documentation. The
ghc683-prof package contains
profiling-capable versions of the standard libraries (note:
its version number may have changed by the time you read
this).
Once installation has finished, you should be able to run ghci from the shell immediately. You won't need to change your shell's search path, or set any environment variables.
Installing Haskell software
Almost all Haskell libraries are distributed using a standard packaging system named Cabal. You can find hundreds of Haskell open source libraries and programs, all of which use Cabal, at http://hackage.haskell.org/, the home of the Hackage code repository.
Automated download and installation with cabal
A command named cabal automates the job
of downloading, building, and installing a Haskell package. It
also figures out what dependencies a particular library needs,
and either makes sure that they are installed already, or
downloads and builds those first. You can install any Haskell
package with a single cabal install
mypackage
command.
The cabal command is not bundled with GHC, so at least as of version 6.8.3 of GHC, you will have to download and build cabal yourself.
Installing cabal
To build the cabal command, download the sources for the following four packages from http://hackage.haskell.org/
Follow the instructions in the section called “Building packages by hand” below to manually build each of
the four packages above, making sure that you leave
cabal-install until last.
After you install the cabal-install
package, the $HOME/.cabal/bin directory will
contain the cabal command. You can
either move it somewhere more convenient or add that
directory to your shell's search path.
Building packages by hand
If you download a tarball from Hackage, it will arrive in source form. Unpack the tarball, and go into the newly created directory in a command shell. The process to build and install it is simple, consisting of three commmands:
Configure for system-wide installation (i.e. available to all users):
$runghc Setup configure -pAlternatively, configure to install only for yourself:
$runghc Setup configure --user --prefix=$HOME -pBuild (this will build each source file twice, with and without profiling support):
$runghc Setup buildInstall if you chose system-wide configuration above:
$sudo runghc Setup installAlternatively, if you chose configuration for yourself only:
$runghc Setup install
If you build by hand, you will frequently find that the configuration step fails because some other library must be installed first. You may find yourself needing to download and build several packages before you can make progress on the one you really want. This is why we recommend using the cabal command instead.
 Want to stay up to date? Subscribe to the comment feed for